
Insert Data to Table through Form Using ASP.NET
This tutorial will explain, how to create a simple form and save it to the database in the web site. I have used Visual Studio 2010 for this demonstration. The procedure and the code can be used in Visual Studio 2008 as well.
1. Create a Web Site
Visual Studio 2010 allows us to create several types of web sites. Here I am creating a "ASP.Net Web Site" Which has a simple interface already designed using a master page. Here my concentration is on how to insert the data to the database, but my design will not be very rich and good looking.

- Create a New Web Site
You can see the available website templates. I am selecting ASP.NET Web Site for future needs as well. You can select ASP.NET empty Webb Site as well if you need to develop from scratch.
I have named the web site as "InsertData". Give the name as you wish and meaning fully.

- Select ASP.NET Web Site
2. Create a ASP.NET page
In this template there are some already available files. For example site.master, About.aspx, Default.aspx are already available. So we do not have to worry about those pages.
- I will be creating a new page named "InsertData.aspx".
- In future we can add this page to "site.master" page.
- Right click on the website and go to "Add New Item..".
- Add a new "Web Form" named "InsertData.aspx".

- Add New Item

- Create a New Web Form
3. Creating a Simple Form
- First I remove the "Div" tag which was already in the page.
- Then I added a HTML table. This will help us to arrange the items.

- Add New Table
- Add standard Lable, Textbox, RadioButtonList and Button as follows.
- You must make sure you add all this from "standard" menu and not from "HTML" menu.
- This will help us to write server side coding.
- Set the "Text" property of label and Button. Name it as Full Name, E-Mail, Sex, Submit and Clear.
- I have explain how to set the properties of Radio Button List below.

- Add a New Form

- Set the Text for the Label
- To set the property of "RadioButtonList" click on Edit Items and add Items, Male and Female.

- Edit Items For RadioButtonList
The Final Form will look like this. I have added a extra label which will not have a "Text" property. This is to display the result after submitting the form.

- Applicant Form
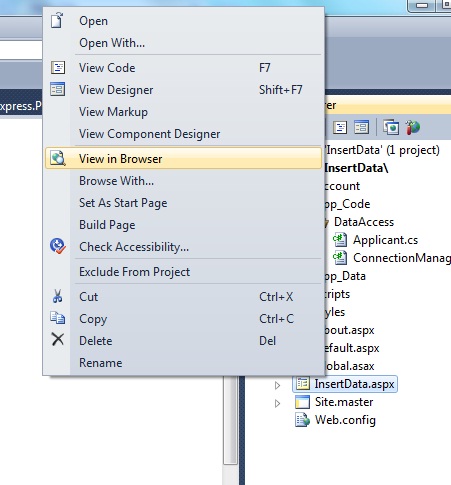
You can see your output by clicking on the page and select "View in Browser".
Also you can go to "Browse with" and select the browser that you want to view or set the default browser as well.
This is the end of the Presentation layer and now we need to look at the Database layer.
4. Adding a SQL Server Connection
- Go to View and open the Server Explorer.
- First you need to Add Connection.

- Add Connection
- The Sever name should be "yourComputerName\SQLEXPRESS" or ".SQLEXPRESS" and click on Test Connection to test whether the connection is successful.
- If successful enter the database name.

- Test Connection
If this is the first time you are creating the database the following message will be prompted. Click Yes to continue.

- Message
Now you have finished adding the connection and created the database. Next is to create a table to save the data.
5. Creating a Table
- Expand the Database.
- Right Click and add a New Table.

- Add a New Table
- Include the table definition.
- This should match the fields in the GUI that you created.
Table Definition
- FullName - varchar(50)
- EMail - varchar(50)
- Sex - varchar(10
The length of the Data Type can be decided by your need.
- I save the table as "ApplicantInfo"

- Include Table Definition
Next I will create a stored procedure to insert data into the table.
Right click on the Stored Procedure and Add New Stored Procedure.

- Add a Stored Procedure
I have written a INSERT stored procedure.
Then I save it as "InsertApplicant".
When you save it "CREATE" will changed to "ALTER". It happens automatically.
You can execute the stored procedure to see whether there are any errors.
If there are no errors it will prompt to enter data. You can enter the data and click "OK".
Then go to the table right click and click on "show table data".
See whether your entered data is available.
Now we can call this stored procedure from our code and insert data into the table.

- Insert Stored Procedure
6. Creating the data access layer. (APP_Code)
Here I write code for establishing the database connection and to call the stored procedure that we wrote.
Create the predefined "App_Code" as follows.

- Create App_Code folder
Inside this folder create another folder name "DataAccess". Creating this folder is an optional.
Inside the "DataAccess" Folder create 2 "cs" class files. This can be done by Right clicking the "DataAccess" Folder and adding New Item.
The two class files are "ConnectionManager.cs" and "Applicant.cs".

- ConnectionManager.cs
Code inside "ConnectionManager.cs"
| using System;
using System.Data;
using System.Configuration; using System.Linq; using System.Web; using System.Web.Security; using System.Web.UI; using System.Web.UI.HtmlControls; using System.Web.UI.WebControls; using System.Web.UI.WebControls.WebParts; using System.Xml.Linq;
using System.Data.SqlClient;
public class ConnectionManager { public static SqlConnection GetDatabaseConnection() { string connectString = "Data Source=.\\SQLEXPRESS;Initial Catalog=Project1;Integrated Security=True"; SqlConnection connection = new SqlConnection(connectString);
connection.Open();
return connection; } } |

- Applicant.cs
Code inside "Applicant.cs" Class
| using System;
using System.Data;
using System.Configuration; using System.Linq; using System.Web; using System.Web.Security; using System.Web.UI; using System.Web.UI.HtmlControls; using System.Web.UI.WebControls; using System.Web.UI.WebControls.WebParts; using System.Xml.Linq;
using System.Data.SqlClient;
public class Applicant
{ public static int InsertApplicant(string fullName,string eMail,string sex) { int rowsAffected = 0;
using (SqlConnection connection = ConnectionManager.GetDatabaseConnection())
{ SqlCommand command = new SqlCommand("InsertApplicant", connection); command.CommandType = CommandType.StoredProcedure;
command.Parameters.Add("@FullName", SqlDbType.VarChar).Value = fullName;
command.Parameters.Add("@Email", SqlDbType.VarChar).Value = eMail; command.Parameters.Add("@Sex", SqlDbType.VarChar).Value = sex; rowsAffected = command.ExecuteNonQuery(); } return rowsAffected; } } |
Next is to write the Code for action buttons.
Double click on the Submit button in the design view. This will take to the code behind page.
Code inside InsertData.aspx.cs
| using System;
using System.Collections.Generic;
using System.Linq; using System.Web; using System.Web.UI; using System.Web.UI.WebControls;
public partial class InsertData : System.Web.UI.Page
{ protected void Page_Load(object sender, EventArgs e) {
}
protected void Button1_Click(object sender, EventArgs e) { string fullName = (string)TextBox1.Text; string eMail = (string)TextBox2.Text; string sex = (string)RadioButtonList1.Text;
Applicant.InsertApplicant(fullName,eMail,sex);
Result.Text = "Your form is successfully submitted";
}
protected void Button2_Click(object sender, EventArgs e) {
TextBox1.Text = null;
TextBox2.Text = null; RadioButtonList1.Text = null; } } |
Now we have finished all the steps that we needed. Now browse the "InsertData.aspx".
Enter the data as your wish.
Click on "submit" button.
The output looks as follows.

- OUTPUT
The main target is to explain how to insert the data into the database. If there are any doubts please notify me. So that I can solve those issues.
You can create your own complicated forms and insert data.
The following is a sample form that I created in the ASP.NET with additional features.

- Student Registration Form
No comments:
Post a Comment